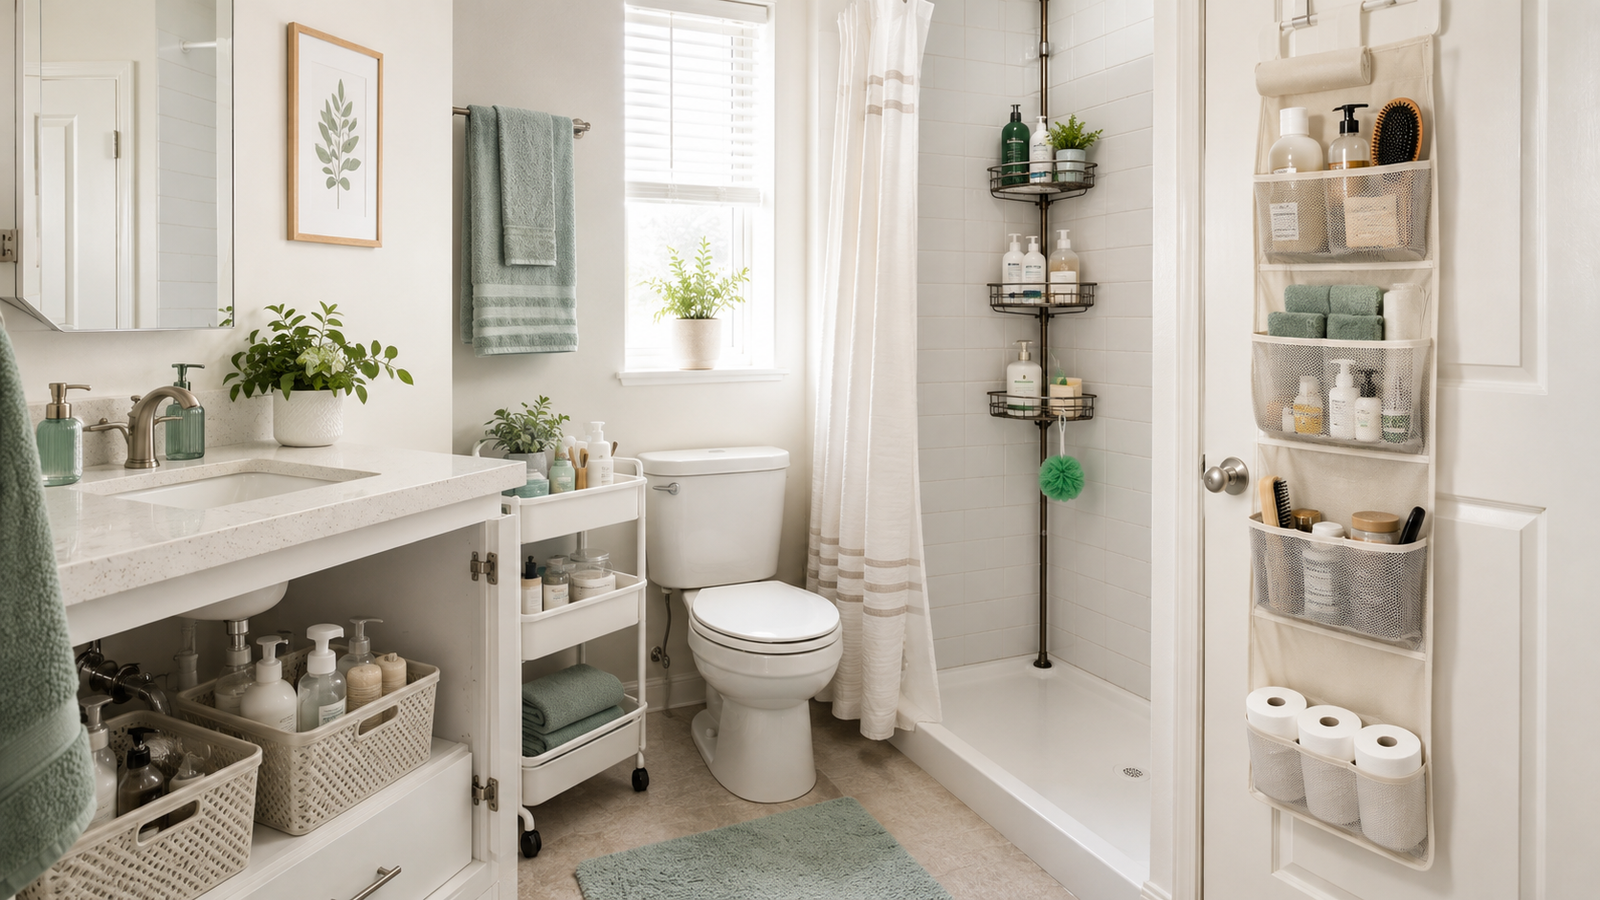
Bathroom storage without drilling starts with finding space you already have: behind the door, beneath the sink, beside the toilet, or inside the shower. The right organizer can give towels, toiletries, and everyday supplies a place without requiring a permanent wall installation.
For renters, the challenge is choosing something that fits both the bathroom and the surfaces you’re allowed to use. A narrow cart might solve a crowded counter, while a tension caddy can keep shampoo bottles off the tub ledge.
“No-drill” doesn’t automatically mean damage-free. Adhesive, suction, tension, and door-mounted products each have limitations. These 15 ideas will help you match storage to your space, with practical precautions for installation, everyday use, and eventual removal.
What to Consider Before Adding Bathroom Storage Without Drilling
Before choosing an organizer, decide what needs a home. Full shampoo bottles need different support than cotton rounds, and damp towels need airflow rather than a closed bin.
Check these five things:
- Available space: Measure width, depth, and height. Include baseboards, plumbing, door swings, and room to pull out drawers.
- Surface type: Smooth tile, textured tile, painted drywall, glass, and cabinet finishes behave differently. Match the organizer to surfaces its manufacturer approves.
- Moisture exposure: A shelf inside the shower faces more water than one beside the vanity. Check whether the product is intended for that location.
- Loaded weight: Count the contents, including full bottles and wet towels. Follow the stated capacity and installation conditions.
- Lease rules: Check restrictions on adhesives, door attachments, and furniture anchoring. Ask your property manager when permission is unclear.
Start with storage that uses existing shelves, cabinets, or suitable floor space if you want to minimize contact with walls. Then consider mounted options where they solve a specific problem.
Also plan how you’ll clean around the organizer. Storage that blocks plumbing access or traps water can create more work than it saves.
15 Renter-Friendly Bathroom Storage Ideas Without Drilling
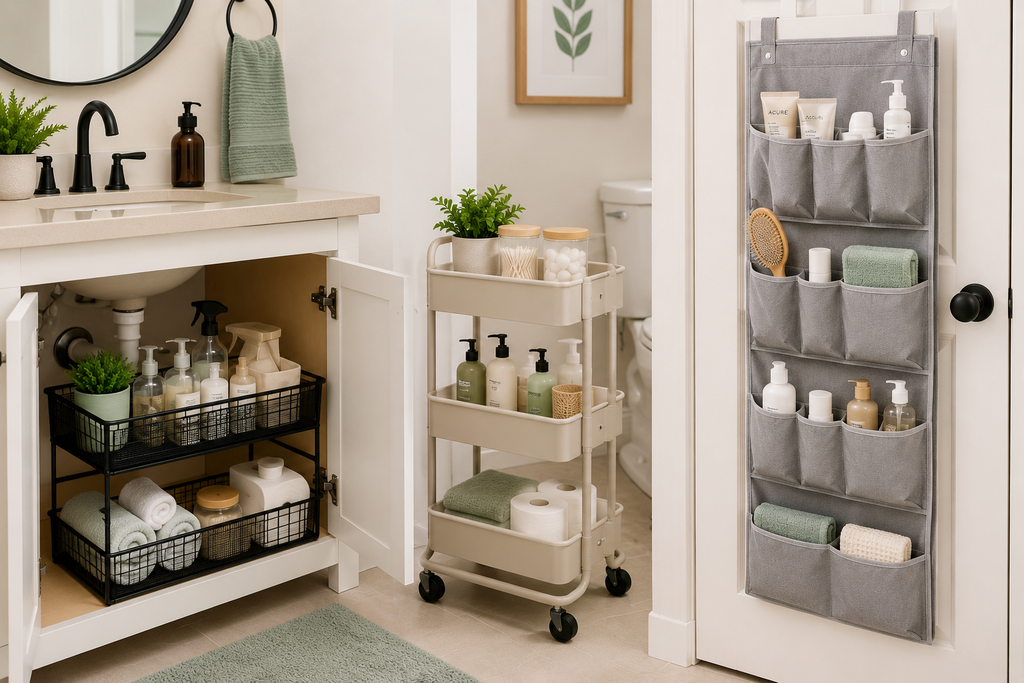
1. Use an Over-the-Door Bathroom Organizer
An over-the-door organizer turns the back of the bathroom door into storage for brushes, spare toiletries, and lightweight supplies. Pocket versions work well when several people need separate spaces.
Measure the door thickness and the clearance above it. Hooks that are too thick can prevent the door from closing or rub against the frame.
Choose a shallow organizer that won’t hit the wall or interfere with the handle. Keep heavy bottles elsewhere, and use protective pads only where they won’t make the fit too tight.
Before choosing one, see our guide to over-the-door bathroom storage for tips on measuring door thickness, clearance, and fit.
2. Install a Tension Shower Caddy
A tension shower caddy uses pressure between two surfaces to support shelves, often in a shower corner. It can free the tub ledge from bottles without adhesive mounting.
Measure the installation height and check that both contact surfaces are suitable. Avoid fragile ceiling panels, loose finishes, and locations the instructions exclude.
Distribute bottles across the shelves instead of loading one side heavily. Check the pole periodically for movement. If keeping it upright requires repeatedly increasing pressure, reassess the fit rather than overtightening it.
Before buying one, see our guide to choosing a tension shower caddy for renters, including what to measure, stability, drainage, and rental damage risks.
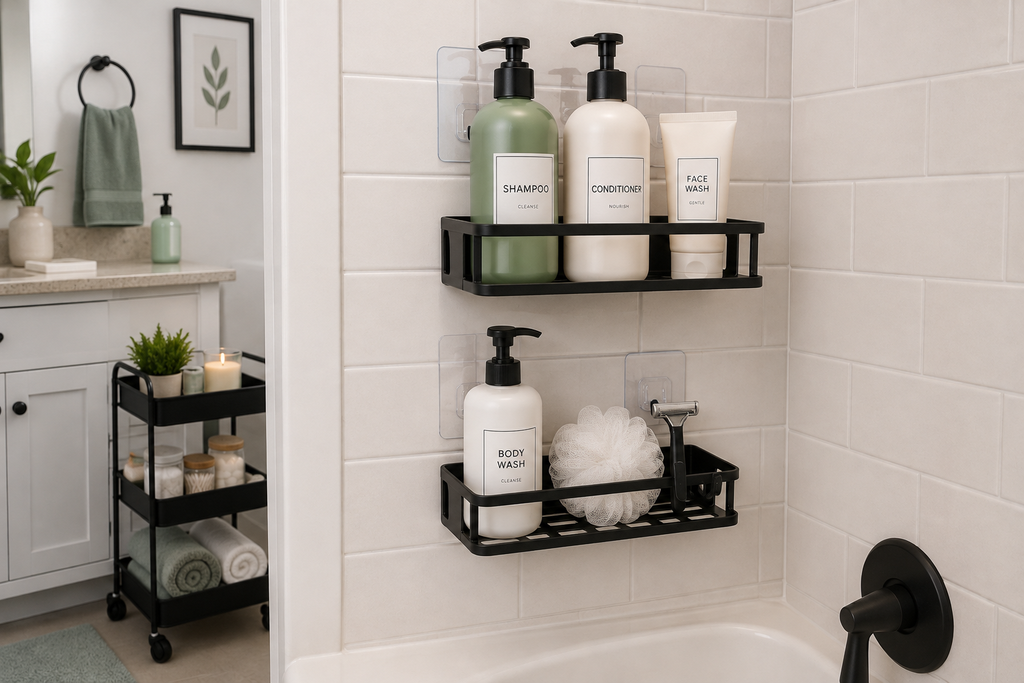
3. Try Adhesive Shower Shelves
Adhesive shower shelves can put everyday products within easy reach when you have a compatible mounting surface. Look for drainage openings and enough room to lift bottles out comfortably.
Choose a shelf specifically intended for shower conditions, and read its removal instructions before installing it. Some mounting pads are harder to remove than stretch-release strips.
Follow the product’s cleaning, drying, and waiting instructions exactly. Don’t assume different adhesives share the same process. Keep the load within the stated limit, and avoid placing breakable items on the shelf.
If you’re deciding between mounting methods, see our comparison of adhesive vs suction shower shelves for the key differences in surface compatibility, removal, and renter damage risk.
 Save
Save4. Add Freestanding Over-the-Toilet Storage
Over-the-toilet shelving uses vertical space that often sits empty. It can hold spare toilet paper, folded towels, and baskets of backup toiletries.
Measure around the tank, supply valve, baseboards, and toilet lid. Leave enough clearance to remove the tank lid and reach plumbing connections.
Check the assembly instructions before buying. Some units marketed as freestanding still require wall anchoring. If anchoring is required and you cannot obtain permission, choose another design rather than omitting the restraint. Keep heavier supplies on lower shelves.
5. Use a Slim Rolling Bathroom Cart
A slim cart can fit beside a vanity or in another unused gap. It’s especially useful when you want to pull toiletries closer while getting ready, then put them away.
Measure the narrowest point, including handles and baseboards. Leave room to grip the cart and roll it out without scraping nearby surfaces.
Choose trays that contain small items and materials suited to humidity. Put heavier bottles on the bottom. Keep the cart out of the doorway and away from spots where you might need steady footing.
6. Try Suction-Cup Organizers
Suction organizers are useful for small shower items when the surface can maintain a seal. Smooth, flat, nonporous areas are generally better candidates than textured finishes.
For example, IKEA specifies flat surfaces such as glass, mirrors, and tile for its TISKEN suction basket. That guidance applies to that product; check the instructions for whichever organizer you choose. IKEA’s surface guidance
Position cups entirely on a suitable surface rather than across grout lines. Start with light items and check for slipping. Don’t put fragile or valuable objects where a failed seal could send them falling.
7. Add Removable Adhesive Hooks
Removable hooks can give a robe, washcloth, or lightweight toiletry bag a dedicated place. A few well-positioned hooks may be enough to clear a crowded counter.
Choose a bathroom-appropriate product and account for the weight of wet items. Leave access to any removal tab.
Follow the exact removal method for the hook. For example, Command’s bathroom instructions call for slowly stretching its removal strip downward along the wall, rather than pulling outward. Other adhesives may work differently. Command’s installation and removal guidance
8. Use Countertop Organizers
A small tray, divided holder, or compact tiered organizer can make a limited counter easier to use. The goal is to group daily essentials while preserving space around the sink.
Try keeping hand soap, moisturizer, and your morning products together. Move backups and rarely used items into a cabinet.
Check that the organizer doesn’t block the faucet handle or overlap the basin. Choose something easy to lift for cleaning, and wipe beneath it regularly so splashes don’t remain trapped against the counter.
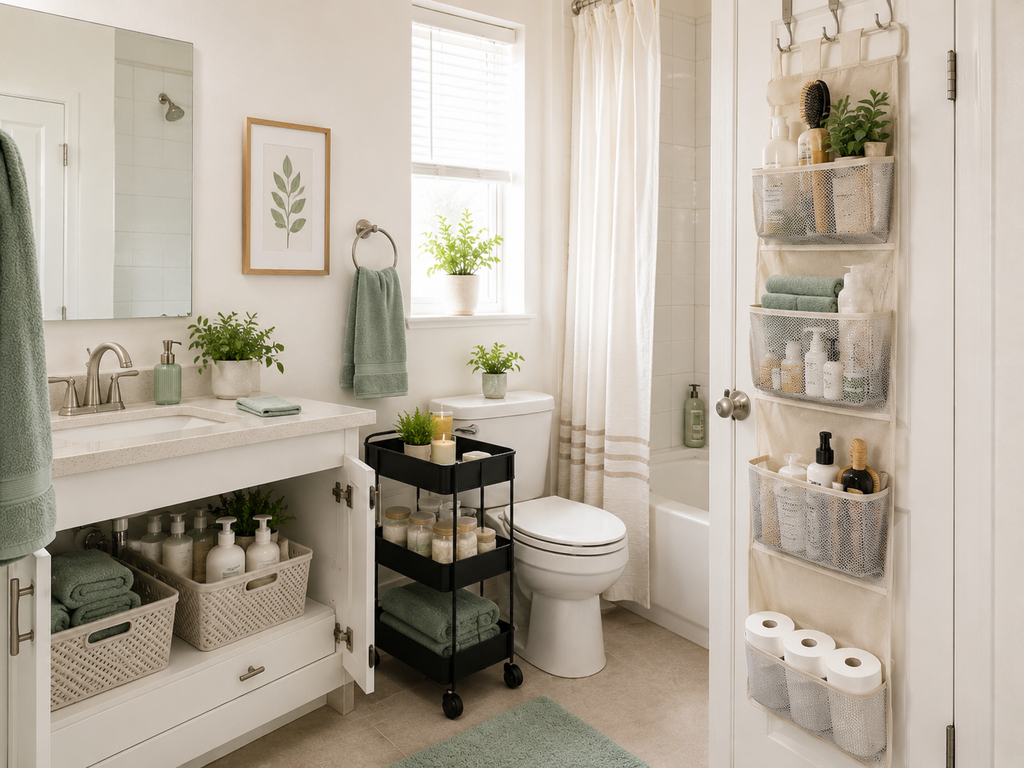
9. Organize the Space Under the Sink
Under-sink storage works best when it fits around the plumbing. Measure usable space on both sides of the drain rather than treating the cabinet as one empty rectangle.
Separate pull-out bins can be more flexible than a single large organizer. Use one for hair products and another for cleaning supplies, keeping those categories apart.
Leave valves, pipe joints, and the back of the cabinet accessible. Avoid packing supplies tightly enough to conceal a leak. Store cleaning products securely if children or pets can access the bathroom.
 Save
Save10. Add a Slim Freestanding Storage Tower
A narrow storage tower can provide drawers or shelves beside a vanity without occupying much floor area. Enclosed compartments are useful for items you’d rather keep out of sight.
Measure with the drawers open, not just closed. A tower that fits in a gap may still be awkward to use.
Choose a stable design appropriate for your space and follow all anchoring instructions. Check whether the material tolerates bathroom humidity, and avoid putting vulnerable edges directly beside a shower or on a floor that frequently gets wet.
11. Use Magnetic Storage Where Suitable
Magnetic cups or small baskets can work on an existing magnetic metal surface, such as a compatible medicine cabinet. They can organize lightweight accessories without adhesive.
Test the surface first: not every metal is magnetic, and a weak attraction is unsuitable for storage. A metal plate that must be glued to the wall introduces the same adhesive considerations as other mounted products.
Check for scratching, sliding, and interference with cabinet doors or shelves. Keep magnets away from items whose instructions warn against magnetic exposure.
12. Add a Tension Rod Inside a Cabinet
A short tension rod can create a hanging spot for lightweight items inside a cabinet. It may hold small empty spray bottles by their triggers if the rod, bottles, and cabinet are suitable.
Check the span and the condition of the side panels. Thin panels, peeling finishes, or uneven surfaces may not tolerate the pressure well.
Avoid hanging heavy, full bottles or using plumbing as support. Keep a bin underneath to catch a dropped item, and remove the rod if it slips or leaves pressure marks.
13. Use Stackable Bins and Baskets
Stackable containers make better use of shelves that have unused height. They’re helpful for grouping spare soap, washcloths, and unopened toiletries.
Choose sizes that let you retrieve supplies without dismantling the whole stack. Open-front bins can work for frequently used items; lidded containers suit dry backups.
Keep stacks low and stable, with heavier contents at the bottom. Don’t pack damp cloths into closed containers. Simple category labels can help a shared bathroom stay organized without needing a separate container for every small item.
14. Add Door-Mounted Towel Storage
Door-mounted towel bars or racks can create hanging space when the bathroom has too few existing rails. Spaced bars may let towels hang more openly than a crowded row of hooks.
Check the door’s thickness, top clearance, and opening path. Make sure the rack doesn’t strike nearby fixtures or prevent the latch from closing.
Allow enough room for towels to hang without dragging or bunching against the door. Account for wet towel weight, and inspect contact points for rubbing. Avoid overloading a hollow-core door.
When planning bathroom storage without drilling, focus on solutions that fit your available space, surfaces, and everyday storage needs.
 Save
Save15. Use a Freestanding Ladder Shelf
A compact ladder-style shelf can hold baskets, folded towels, and everyday supplies in an unused corner. Open shelves also make it easy to see what you have.
Distinguish between a genuinely freestanding design and a leaning ladder that requires wall attachment. Follow the manufacturer’s stability and anchoring instructions.
Check the full footprint, including the lower shelves, so it won’t crowd the walking route. Store heavier items low and keep loose objects away from shelf edges. If the bathroom is too narrow, a shorter unit may be more practical.
Which No-Drill Bathroom Storage Solution Is Best for You?
Choose the location first, then the organizer. Buying extra capacity won’t help if it makes the sink harder to reach or leaves you moving a cart every time you enter.
| Your main problem | Options to consider | Check before choosing |
|---|---|---|
| Bottles crowd the shower | Tension caddy, adhesive shelf, suction organizer | Surface compatibility, drainage, loaded weight |
| Counter space is limited | Small tray, under-sink bins, slim cart | Daily access and remaining sink clearance |
| There’s no room for towels | Door-mounted rack, suitable hooks | Door fit, wet weight, drying space |
| Backup supplies need a home | Stackable bins, over-toilet shelves | Access, stability, anchoring requirements |
| Wall finishes seem fragile | Cabinet bins, countertop storage, suitable freestanding unit | Floor space and furniture instructions |
| A narrow gap is unused | Rolling cart, slim tower | Baseboards, handles, drawer clearance |
In a very small bathroom, combine two modest solutions before adding a large unit. Under-sink bins plus a door rack may solve more problems than shelving that crowds the toilet.
How to Reduce the Risk of Damage in a Rental Bathroom
No-drill storage can still leave marks, lift paint, scratch finishes, or put pressure on doors and cabinets. Results depend on surface type, moisture, installation, removal, product instructions, and lease rules. If you’re unsure about a surface or attachment method, use storage that rests on an existing shelf or suitable floor area instead.
Before installing anything:
- Photograph the area. Record existing chips, stains, scratches, or loose finishes.
- Check permission requirements. Keep any written approval with your rental records.
- Read the full instructions. Include surface exclusions, weight limits, waiting periods, and removal steps.
- Check cleaner compatibility. Use preparation products approved for both the organizer and the surface. Don’t improvise with abrasive cleaners or solvents.
- Plan removal access. Don’t trap adhesive tabs behind fixtures or furniture.
- Check door movement. Open and close doors carefully with the empty organizer fitted before loading it.
- Keep access clear. Leave plumbing, outlets, ventilation, and walking routes unobstructed.
After installation, inspect storage periodically. Look for slipping supports, lifting adhesive edges, rust, trapped moisture, and new rubbing marks. Empty an organizer if it begins moving.
When removing it, unload everything first and follow the specified procedure. Avoid prying against tile, yanking attachments, or applying heat or solvents unless the relevant instructions permit it. Never skip a required furniture restraint to make an item “no-drill.”
Frequently Asked Questions
What is the best bathroom storage for renters?
The best option fits your available space and doesn’t require an attachment your lease prohibits. Under-sink bins and countertop organizers are useful starting points. Door racks, carts, and shower organizers can add capacity once you’ve checked fit, surface compatibility, and stability requirements.
Do adhesive bathroom shelves damage walls?
They can. Paint condition, surface material, moisture, installation, load, and removal all affect the outcome. “Removable” doesn’t guarantee an undamaged finish. Read surface exclusions and removal instructions before installing, and avoid using an adhesive shelf where compatibility is uncertain.
Can suction storage work on bathroom tiles?
Yes, when the product is compatible with the tile and the mounting area allows a reliable seal. Smooth, flat tile is generally more suitable than textured tile. Keep cups off grout lines, follow preparation instructions, and inspect the organizer for movement rather than assuming the initial grip will last.
What can I use instead of drilling into bathroom walls?
For bathroom storage without drilling, options include over-door organizers, tension caddies, cabinet bins, countertop trays, rolling carts, and suitable freestanding shelves.
Options include over-door organizers, tension caddies, cabinet bins, countertop trays, rolling carts, and suitable freestanding shelves. Adhesive and suction storage may also work on approved surfaces. Magnetic organizers are another possibility when you already have a compatible metal surface.
How can I add storage to a very small bathroom?
Start by removing unused products and storing backups elsewhere if possible. Then use the cabinet interior, back of the door, and narrow gaps. Keep daily items easy to reach, but preserve enough open space to use the sink, toilet, and shower comfortably.
Final Thoughts
Adding bathroom storage without drilling works best when you solve one everyday problem at a time. Start with the items that crowd your sink or shower, measure the available space, and choose the simplest suitable organizer.
A few well-placed bins, a properly fitted door rack, or a compatible shower caddy may be all you need. Prioritize clear access, easy cleaning, and careful installation over filling every empty space.
1 thought on “How to Add Bathroom Storage Without Drilling: 15 Renter-Friendly Ideas”
Comments are closed.