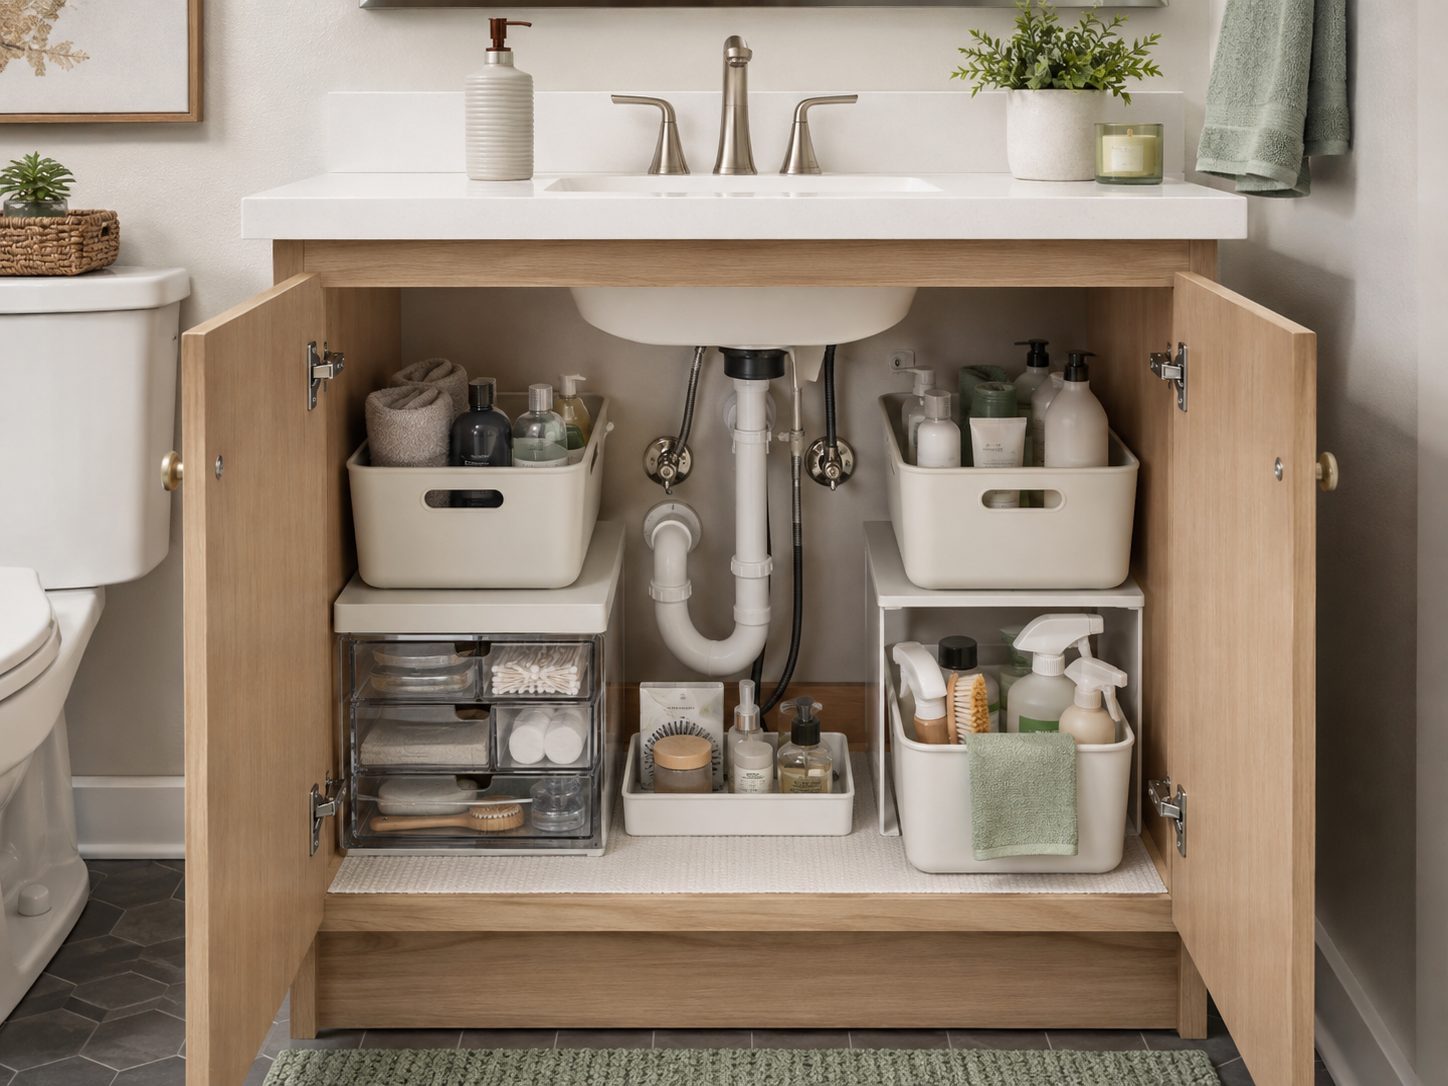
Under a bathroom sink, even a small collection of toiletries can become difficult to manage. Bottles disappear behind the drain, cleaning supplies crowd out everyday essentials, and spare products collect wherever there is an opening.
The solution is not necessarily a large organizer. It is a layout that works with your cabinet’s plumbing, keeps useful items within reach, and leaves enough visibility to notice a leak.
If you’re wondering how to organize under a bathroom sink, start by emptying the space and measuring its usable sections—not just its overall dimensions. Then choose a few removable containers that fit those sections.
For renters, reversibility matters. You should be able to lift out the storage, inspect the cabinet floor, and give maintenance access without removing a complicated installation.
These 12 ideas will help you create a practical setup without drilling or treating every inch of open space as something you need to fill.
Why Under-Sink Bathroom Storage Is Difficult
An under-sink cabinet is not an ordinary cupboard. The drain, water supply lines, and shutoff valves divide it into irregular spaces. A tall organizer may fit beside the basin but collide with a pipe farther back.
Door hinges and center dividers create additional obstacles. An organizer can fit inside the cabinet and still be too wide to pull through the opening.
The location also calls for extra care. A small plumbing leak may go unnoticed behind tightly packed products. Damp packaging and spills can leave the cabinet harder to clean or inspect.
Think of the cabinet as several storage zones around a working plumbing system. The goal is convenient storage with clear access—not maximum packing capacity.
What to Measure Before Buying Organizers
Learning how to organize under a bathroom sink starts with understanding the usable space around the plumbing, not just the cabinet’s total dimensions.
Empty the cabinet first. Check for dampness, staining, loose surfaces, or an existing leak before putting anything back. Report unresolved problems to your property manager before covering the area with storage.
Measure these features:
- Usable width: Measure each side of the drain separately.
- Usable depth: Check from the front opening to the first obstruction, not just the back wall.
- Clear height: Measure beneath the basin and beside any low pipes.
- Door opening: Account for hinges, a center divider, and how far the doors open.
- Access space: Identify the room needed to reach valves and remove containers.
For drawers, measure the space needed for the drawer to open. For door storage, check whether the loaded organizer would hit the plumbing or other containers when the door closes.
Compare both external and internal organizer dimensions when available. A bin may fit the cabinet but have a narrow interior that will not hold your bottles.
Before buying, mark a proposed footprint with paper or use an empty box to test placement in a dry cabinet. Remove the mock-up afterward rather than leaving absorbent cardboard under the sink.
How to Organize Under a Bathroom Sink: 12 Practical Ideas
1. Use Separate Bins on Each Side of the Drain
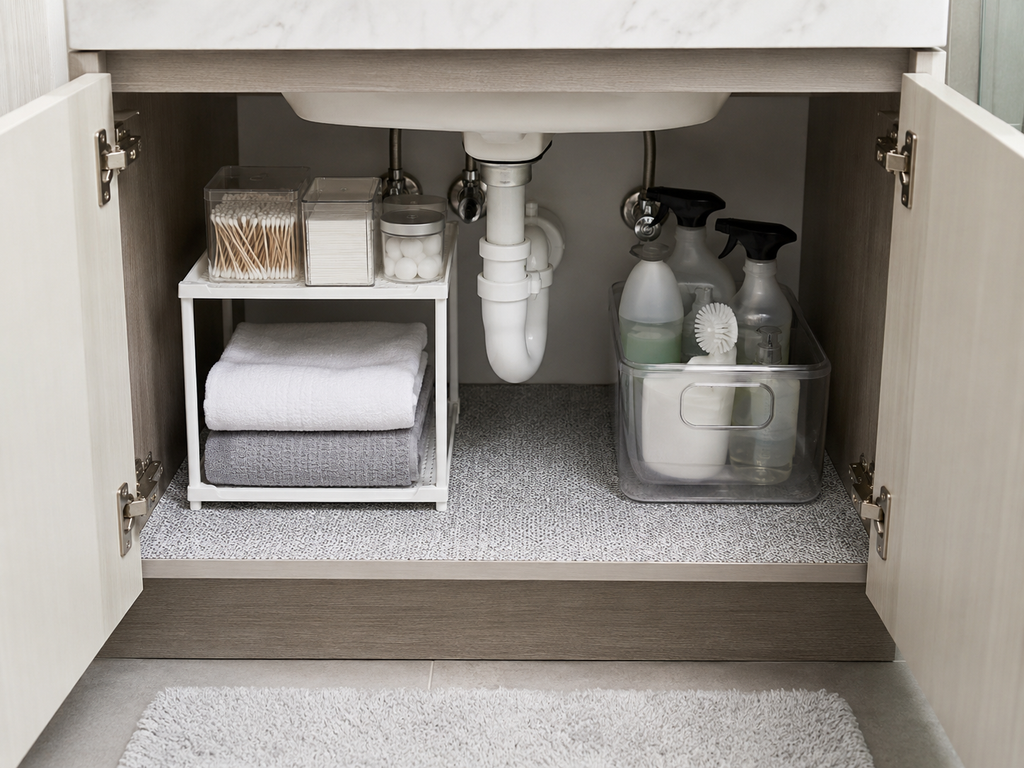
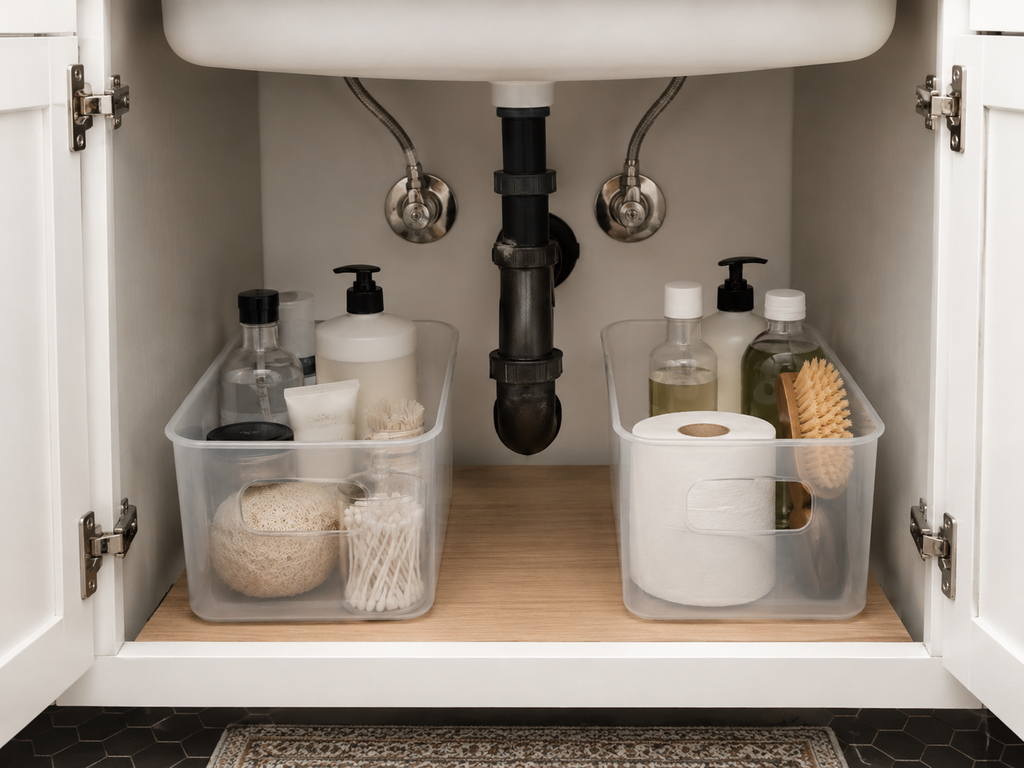
Two modest bins are often easier to position than one large organizer. Place one on either side of the drain and leave the middle accessible.
Give each bin a clear purpose: daily toiletries on one side and backup products on the other, for example. Choose sizes based on the items you actually own.
Avoid forcing a bin against a pipe just to make it fit. You should be able to remove it without tilting bottles, catching a supply line, or disturbing the drain.
 Save
Save2. Try Stackable Drawers
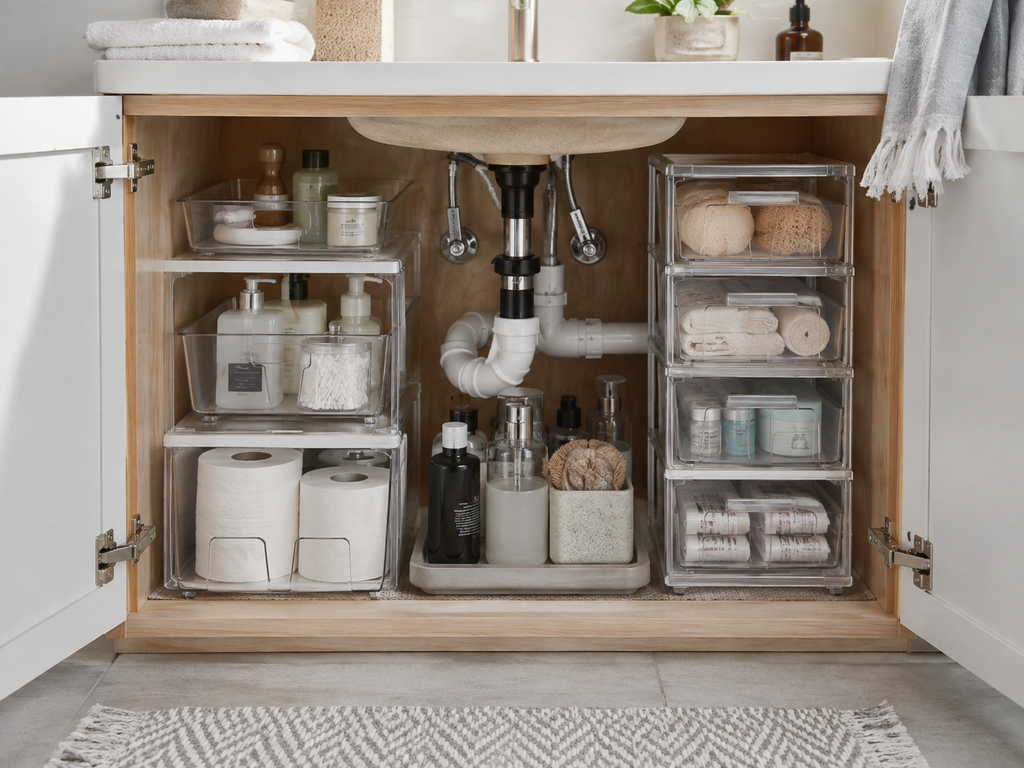
Stackable drawers can use vertical space beside the plumbing, particularly for shorter items that disappear inside deep baskets.
Check the assembled height and whether the drawers are designed to stack securely. Also confirm that each drawer can open with the cabinet door in its usual position.
Keep heavier items low and avoid building a tall stack that feels unstable when opened. The most useful arrangement is one you can operate comfortably—not the tallest one that technically fits beneath the sink.
3. Use Clear Pull-Out Bins
A clear bin with an easy-to-grip front can make products at the back easier to see and retrieve.
Unlike an installed sliding system, a loose pull-out bin can be lifted out for cleaning or maintenance. Check that its base moves without scraping the cabinet surface.
Leave enough room to pull it forward without catching nearby containers. Clear sides help with visibility, but they do not replace lifting the bin occasionally to check underneath it.
4. Add a Small Freestanding Shelf
A small freestanding shelf can divide a tall side compartment into two useful levels.
Place shorter items underneath and frequently used supplies on top, provided the arrangement stays stable. Measure around the basin as well as the drain: the sink itself may reduce clearance above the shelf.
Choose a shelf that stands independently on the cabinet floor. Do not balance it on plumbing or use pipes to support its weight.
Keep its footprint small enough that it remains easy to remove.
 Save
Save5. Use Narrow Storage Beside the Pipes
Slim spaces can hold a narrow bin for smaller bottles or a compact container of grooming supplies.
Measure the narrowest point along the route the container will travel. A bin that fits at the front may not fit beside a bend in the drain.
Avoid wedging items into inaccessible gaps. A little unused space is better than storage that requires rearranging the entire cabinet whenever you need something.
For under bathroom sink storage around plumbing, easy removal is as important as a close fit.
6. Group Daily and Backup Toiletries Separately
Keep products you use regularly near the front. Put unopened replacements in a separate, clearly defined bin.
This reduces the need to search through spare shampoo, toothpaste, or soap to reach everyday items. It also makes duplicates easier to spot before your next shopping trip.
If the cabinet is very small, consider storing backups elsewhere in your apartment. Under-sink storage does not need to accommodate every bathroom-related item you own.
7. Use Door-Mounted Storage Carefully
If you plan to use the bathroom door for storage, our over-the-door bathroom storage guide explains how to check thickness, frame clearance, and loaded fit before choosing an organizer.
Door-mounted storage can free up cabinet-floor space, but it requires a closer fit check than a loose bin.
An over-door organizer may prevent the door from closing or rub against its finish. Adhesive-mounted storage depends on surface compatibility, installation instructions, and the condition of the cabinet.
Check clearance with the door closed and keep within the organizer’s stated load limit. Do not assume “no-drill” means damage-free.
For other places to store bathroom essentials, explore bathroom storage without drilling.
8. Store Cleaning Supplies in a Separate Bin
Keep cleaning products together and separate from personal-care supplies.
Choose a removable bin that lets bottles stand upright. Leave products in their original labeled containers and follow their storage instructions. For additional household chemical safety guidance, see the EPA’s recommendations for storing products safely. Check that caps and triggers are secure before returning them to the cabinet.
A bin can make routine cleanup easier, but it is not a substitute for suitable storage or access controls. If children or pets can reach the cabinet, account for that when deciding what belongs there.
 Save
Save9. Use Small Containers for Loose Items
Hair ties, clips, and other small supplies are easier to manage in a few compact containers than loose in a large basket.
Group similar items together, but avoid creating so many subdivisions that putting things away becomes tedious.
Keep supplies that need to stay clean and dry in an appropriate container, away from potential drips. If the cabinet is frequently damp, move those items somewhere drier.
Choose containers you can lift out easily rather than scattering small trays around the plumbing.
10. Label Categories Instead of Every Item
Useful labels describe a category: “Hair,” “Daily Care,” “Backups,” or “Cleaning.”
Labeling every product creates extra work when your routine changes. A category label gives the container a stable purpose while allowing its contents to evolve.
Place labels where they are visible with the cabinet open. If you use removable labels, attach them to your own containers rather than the cabinet finish.
Keep the system simple enough that another household member can understand it without instructions.
11. Keep Plumbing and Shutoff Valves Accessible
Before calling the cabinet organized, check that the drain and shutoff valves remain accessible.
You should not need to unload several stacked drawers to reach the back. Avoid hanging anything from pipes or fastening organizers to supply lines.
A useful test is to remove each storage unit in turn. Can you lift it out without pulling on plumbing or spilling its contents?
If you cannot identify a valve or are unsure about its condition, ask your property manager rather than experimenting with it.
12. Leave Space to Spot Leaks Early
Do not cover the entire cabinet floor with tightly packed storage.
Leave a visible area beneath the plumbing where you can notice moisture, and periodically lift containers to inspect underneath them. A tidy cabinet can still hide a slow leak.
A removable protective tray may help with minor spills, but water can collect beneath it. Check the tray and the cabinet surface separately.
If you notice unexplained dampness, clear the area and report it. Reorganizing the cabinet is not a repair.
Best Storage Layouts for Different Under-Sink Cabinets
Choose the layout that matches your usable space, rather than copying a cabinet with different plumbing.
| Cabinet type | Practical starting layout | Main fit check |
|---|---|---|
| Narrow cabinet with a central drain | One small bin on each side | Can both bins come out without touching pipes? |
| Wide cabinet with tall side spaces | Short drawer stack on one side; upright bin on the other | Do the basin and valves leave enough clearance? |
| Shallow cabinet | Low, shallow pull-out bins | Can the doors close without hitting handles? |
| Double-sink vanity | Separate removable groups around each drain | Are both sets of plumbing accessible? |
| Cabinet with an awkward center divider | Multiple compact containers | Does each container fit through its own door opening? |
Start with fewer organizers than you think you need. Load them with your actual supplies, close the doors, and try your normal routine.
If retrieving one item requires moving three others, simplify the layout before adding more storage.
What Not to Store Under a Bathroom Sink
Some items are better kept elsewhere, especially if the cabinet has a history of moisture.
Avoid using this space for:
- Important papers or irreplaceable belongings: Store these in a dry, more suitable location.
- Loose cardboard packaging: It can become damp and make spills harder to clean.
- Unprotected spare toilet paper or linens: Keep them elsewhere if dryness is uncertain.
- Electrical appliances near potential drips: Choose storage away from plumbing.
- Products whose labels require different conditions: Follow the stated storage instructions rather than assuming the cabinet is suitable.
Do not use the cabinet as overflow for every rarely used bathroom item. Reducing the contents often improves access more than adding another organizer.
How Renters Can Avoid Cabinet Damage
Prioritize freestanding, removable storage that does not require screws or permanent attachments.
Before placing a shelf or drawer unit, check its feet and underside for rough edges. Lift heavy organizers instead of dragging them. Keep bottle leaks and product residue from sitting on the cabinet surface.
If you use a liner, choose a removable option compatible with the finish. Avoid treating a liner as waterproofing: it can conceal moisture beneath it and will not fix a damaged cabinet.
Be cautious with adhesive hooks, shelf liners, and mounting strips. Removal can affect some finishes even when a product is marketed as removable. Follow the manufacturer’s instructions and any property-specific requirements.
Finally, keep the setup easy to clear. Maintenance access should not depend on dismantling an elaborate storage system.
Frequently Asked Questions
How do you organize under a bathroom sink with a large drainpipe?
Treat the areas on either side as separate compartments. Use smaller bins that can be removed independently, and leave the space around the pipe open. Measure the pipe’s bends and connections, not just its vertical section.
Are drawers or bins better under a bathroom sink?
Drawers suit smaller items and usable vertical space. Bins work well for upright bottles and irregular compartments. Choose based on access: drawers need opening clearance, while bins need room to lift or pull out.
Should you put a liner under bathroom-sink organizers?
A removable liner may make routine cleaning easier, but it is optional. Check compatibility with the cabinet finish and inspect beneath it regularly. Do not use a liner to cover existing dampness or damage.
How can I organize the cabinet without buying anything?
Remove unused items, separate daily supplies from backups, and repurpose clean, suitable containers you already own. Avoid containers that snag plumbing or deteriorate when damp. Test the arrangement before deciding whether a purchase would solve a specific problem.
How often should I check underneath the organizers?
Include a quick check in your bathroom-cleaning routine and inspect again after plumbing work or an unusual spill. If you notice dampness, an unfamiliar odor, or a change in the cabinet surface, investigate rather than waiting for the next cleanup.
Final Thoughts
Knowing how to organize under a bathroom sink is less about filling every gap and more about creating storage that stays accessible around the plumbing.
Start by measuring around the obstacles. Use a few removable containers, separate daily items from backups, and leave room to inspect the cabinet floor.
You do not need to fill every gap. A little open space makes the cabinet easier to use, easier to clean, and easier to clear when maintenance is needed.